If you want to be kind to your blog readers, it’s nice to have a consistent layout on your blog posts (and thumbnail images) so they can more easily take in the information you’re sharing. As a content creator, though, it can be a real challenge to make all of your WordPress images the same size without some unfortunate crops.
First, the problems
Problem 1: Images of differing sizes. Yuck.
A blog page without a uniform layout — e.g. with thumbnails of all different sizes — can look a bit sloppy. You’re likely to end up with big empty spaces in content between where one post ends and the next one begins.
Problem 2: Unfortunate cropping.
If the subject matter in the thumbnails is cropped randomly, then you’re always lopping off the head of the tallest person in the group, or missing key landscape details on the top, bottom, or sides.
What can be done?
WordPress can create many different sized thumbnails of images you upload. And these sizes can also be cropped to achieve classy results.
Image sizes can be set in different places within your WordPress site, including from within your WP dashboard or via the theme or plugins. Here we’ll review the dashboard image size settings, which are also most likely to apply to the theme or plugins.
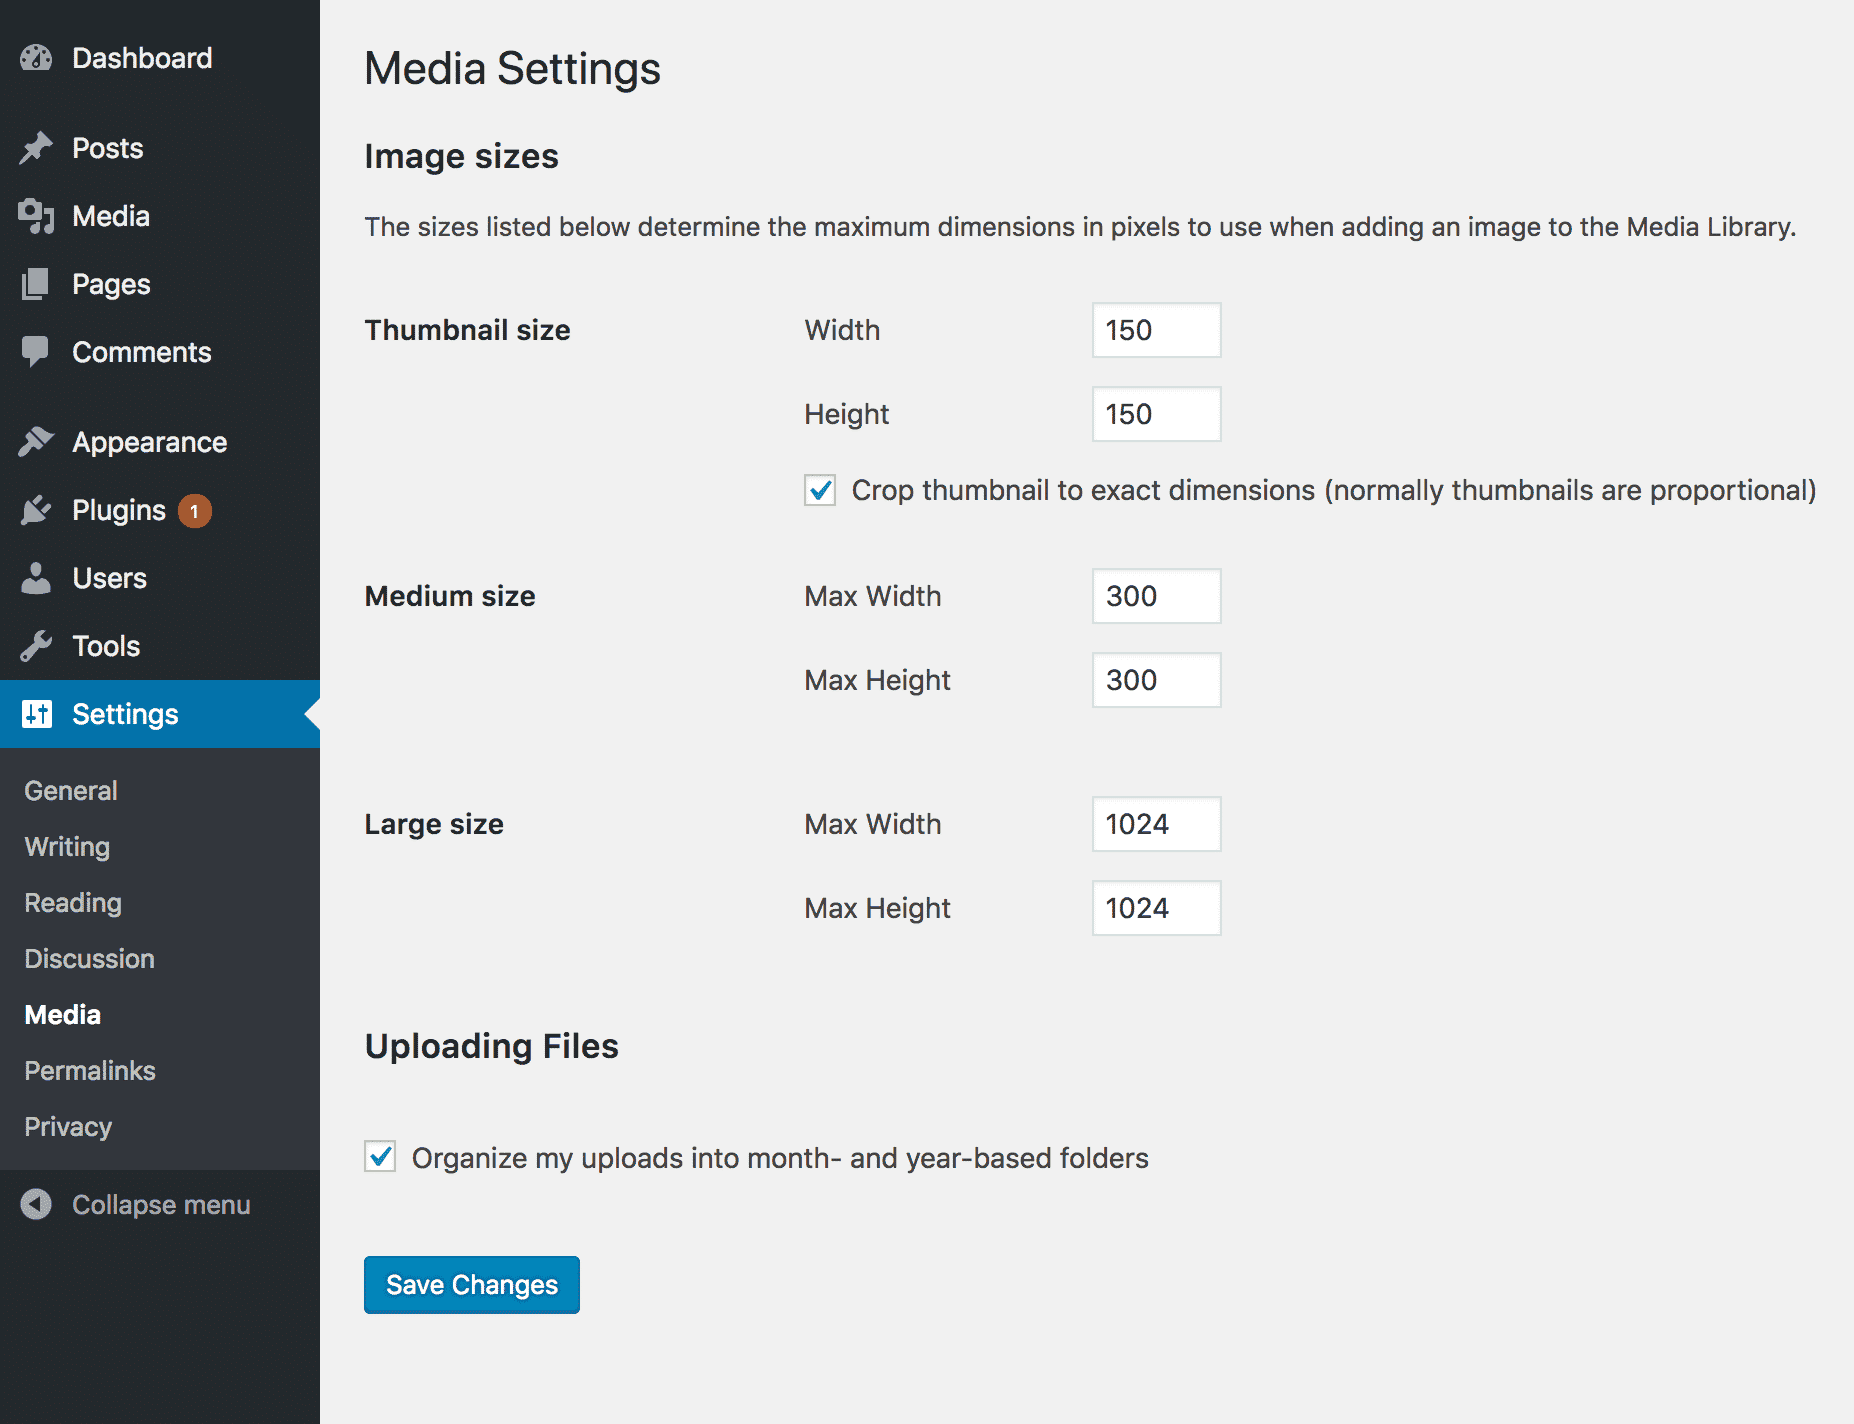
You can find these settings under Settings > Media:

By default, WordPress comes with the three sizes shown above: Thumbnail, Medium and Large. These are in addition to the original uploaded image. For every image you upload, if it’s large enough, WordPress will create these three additional sizes during the upload process. Thumbnail is the only size that can be set to crop. (Don’t worry, though, more cropped sizes can be set from your theme or a plugin, not just the thumbnail size.)
The crop setting will crop any part of the image that does not fit within the dimensions set in your image size. (This is why you accidentally crop poor Danny’s head off each time.)
Here’s an example
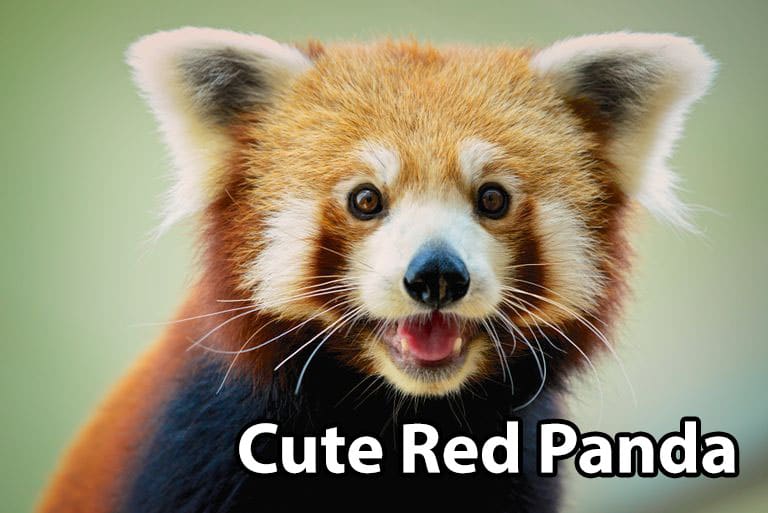
Let’s assume we want to use this red panda image as our post featured image and our thumbnail settings are 200×200 with cropping turned on.

The thumbnail will be displayed on the blog home page and the full size image will display on the post page.

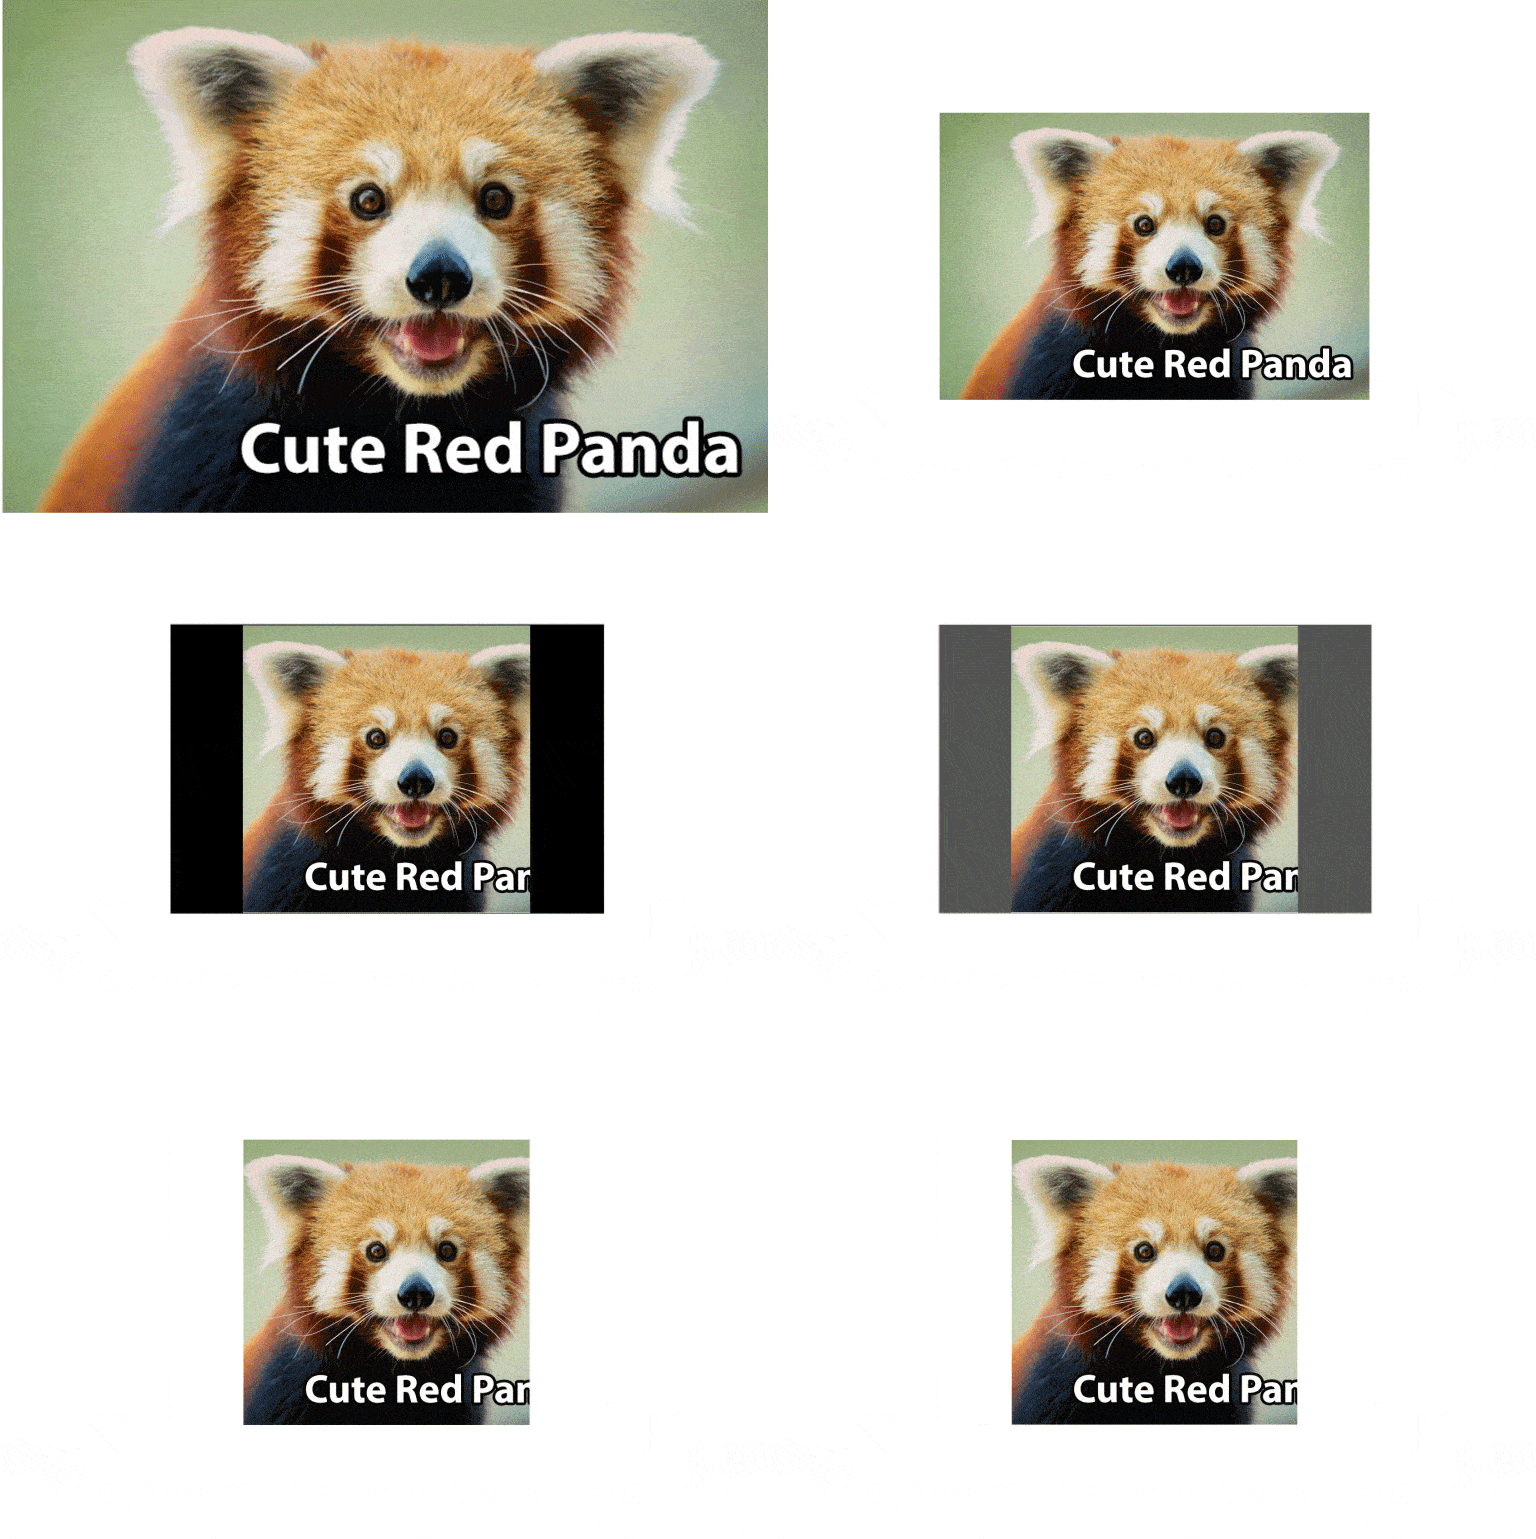
The animation above shows what happens to our image when our thumbnail settings are applied to the WordPress images.
Remember, the images were 200×200 with cropping turned on. As you can see, the image is first resized down until one of either the height or width is 200 pixels. Then, the other dimension is cropped leaving behind our 200×200 thumbnail. Like poor Danny’s head, our “Cute Red Panda” text is now cut off. Cropped images like this might confuse your site visitors, but fortunately, there’s a fairly practical solution.
A fairly practical solution
Determine Your Template Size
Using our 200×200 cropped size as an example, let’s make sure your important content is in the “safe zone.” To set up the template, first you need to use an application like Photoshop. Then, decide on your full-size image dimensions.
Our original red panda image is 629×315. We are happy with this size, so we’ll decide that from here forward all of our blog images, at full size, will be 629×315. Back in our Photoshop document, then, we will set our canvas to those dimensions.
Set Up Your “Safe Zone”
Next, we’ll set up our “safe zone.” Since our thumbnail size is a square, create a square on its own layer and make it as big as you can. This results in a 315×315 square.
You may now be wondering where on your canvas you’ll place this square. Do you place it on the left edge, the right edge or somewhere in the middle? It depends. WordPress images can be cropped from the left, the right, the middle, or any corner. Since the WordPress dashboard settings are set to crop at the middle, place your square in the middle.
The default thumbnail crop setting uses the middle of the image, so you can use that for our example. Now that you have your middle square, you can add guides to either side and delete your unneeded square layer. Your template is now set up!

You can now use your photo editing template to check all of your site images. Just place all of your image content within these guides, and you’ll have much better luck with your images!
Need help designing a website layout that works for you? Contact us, and we’re happy to discuss updating your site – whether you need a full redesign, one new page template, or just some WordPress support for a few questions.


